How to Read a Cross Stitch Chart: Complete Beginner Guide
How to Read a Cross Stitch Chart: Complete Beginner Guide
Co-Founder & Lead Developer
A cross stitch chart is the visual blueprint for your project. It tells you where to place each stitch and which color to use. If you have never read a chart before, it can look overwhelming at first — but the system is simple once you understand the basics.
What Is a Cross Stitch Chart?
A cross stitch chart is a grid where each square represents one stitch. Squares are filled with symbols, colors, or both to indicate which DMC thread to use for that stitch. The chart is essentially a map of your finished design.
- Each square = one cross stitch
- Each symbol = one DMC thread color
- Blank squares usually mean "no stitch" (leave the fabric showing)
Understanding Symbols
Most charts use symbols rather than colors because symbols are easier to distinguish when printed in black and white.
- Every unique symbol corresponds to a specific DMC color number
- The color key (also called a legend) lists every symbol alongside its DMC thread number and color name
- Common symbols include squares, circles, triangles, diamonds, dots, slashes, and letters
- Always refer to the key — do not guess based on how the symbol looks
Reading the Color Key
The color key is your reference guide for the entire project. It typically shows:
- The symbol used in the chart
- The DMC thread number (e.g., 310, 3801, Blanc)
- The color name (e.g., Black, Melon Dark, White)
- The stitch count — how many stitches of that color are in the pattern
Before starting, read through the entire key and organize your threads accordingly.
Grid Lines and Center Marks
Turn Any Photo Into a Cross Stitch Pattern
- Accurate DMC color matching
- Track progress stitch by stitch
- Export print-ready PDF charts
iPhone & iPad
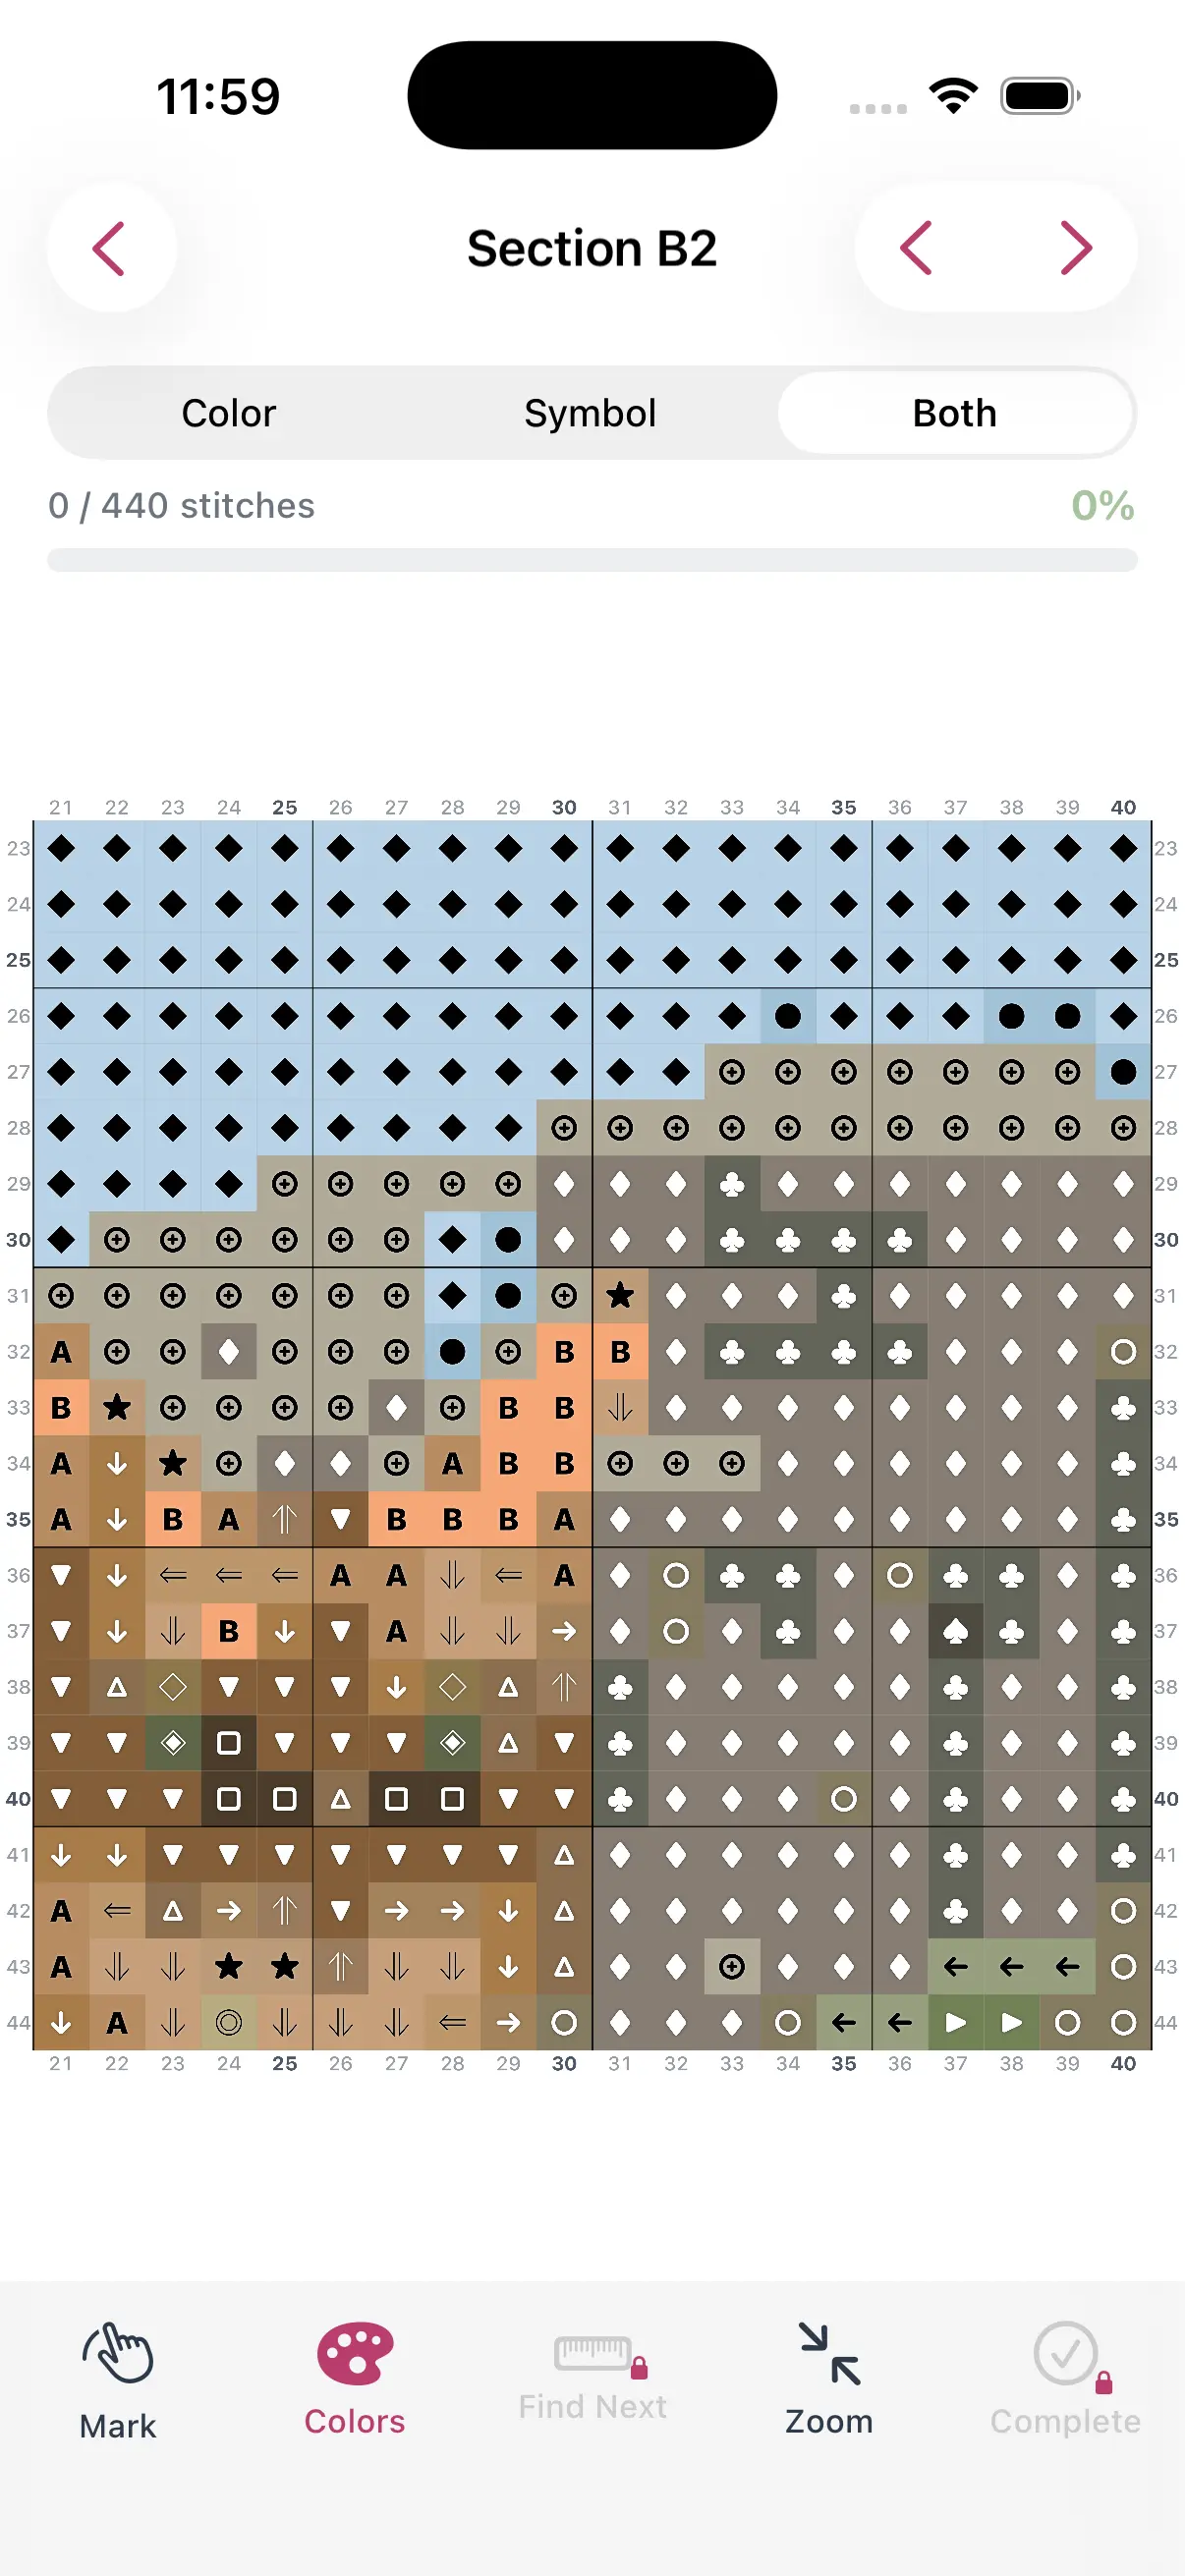
Charts include reference lines to help you navigate:
- Bold grid lines appear every 10 squares, making it easy to count stitches
- Center marks (arrows or lines on the edges) show the exact center of the pattern
- Finding center is important — most stitchers start from the center of the fabric to ensure the design is evenly positioned
Which Direction to Read
Unlike text, cross stitch charts do not have a fixed reading direction. However, most stitchers follow a consistent approach:
- Work from the center outward to keep the design centered on your fabric
- Stitch one color at a time (called "parking" or "cross-country" method) to reduce thread changes
- Or stitch row by row from left to right, completing each row before moving to the next
- The best method is the one that feels natural to you — there is no single correct approach
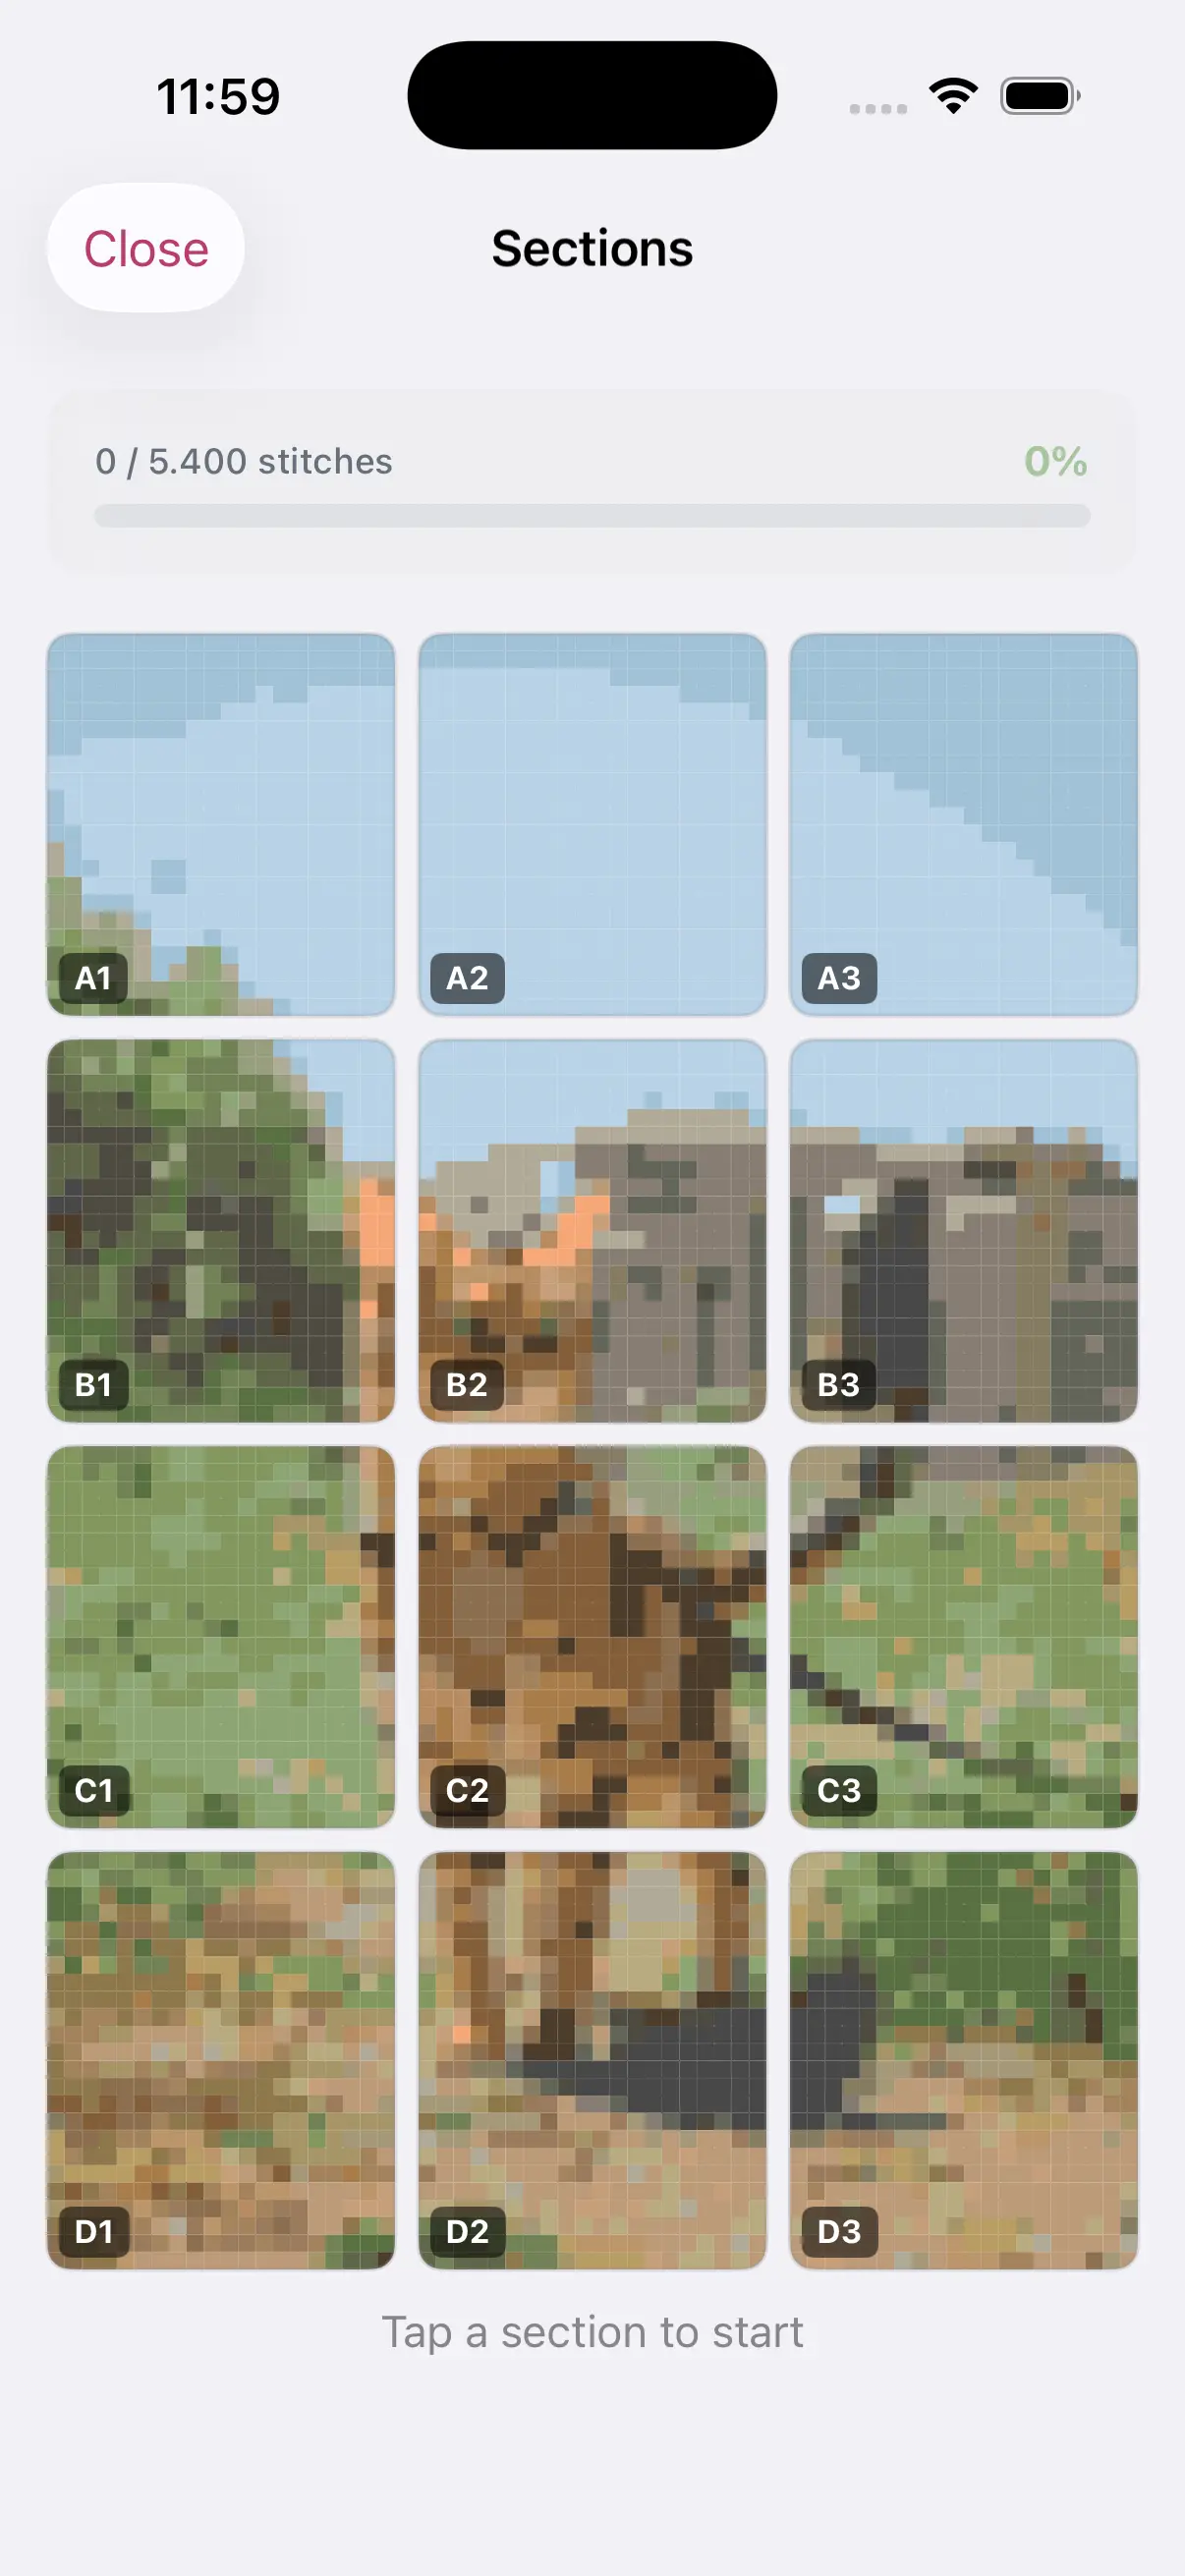
StitchCraft Chart Features
StitchCraft generates clear, easy-to-read charts with several helpful features:
- Zoomable digital charts so you can see individual stitches without squinting
- Color highlighting — tap a color to highlight only those stitches on the chart
- Progress tracking integrated directly into the chart view
- Symbol and color modes — switch between symbol-only, color-only, or combined views depending on your preference
- Automatic grid lines every 10 stitches with center marks included
Tips for Reading Charts Confidently
- Start with a small pattern to practice reading charts before tackling a large project
- Use a ruler or sticky note on printed charts to keep your place on the current row
- Count carefully — most mistakes come from miscounting rather than misreading symbols
- Cross-check by counting from a grid line rather than from the edge of the pattern
- Mark completed sections on printed charts with a highlighter
Reading a cross stitch chart becomes second nature after your first project. Download StitchCraft to explore its interactive chart features and start your next pattern with confidence.