How to Digitize a Hand-Drawn Cross Stitch Design
How to Digitize a Hand-Drawn Cross Stitch Design
Co-Founder & Design Lead
Some of the best cross stitch designs start on paper. A quick sketch, a doodle in a notebook, a motif drawn during a meeting — these raw ideas have energy that purely digital designs sometimes lack. The challenge is turning that paper sketch into a usable cross stitch pattern. Here is how.
Preparing Your Drawing
Before you scan or photograph your drawing, clean it up on paper first. This saves significant editing time later.
- Darken your lines. Go over pencil lines with a fine-tip pen or marker. Faint lines disappear during conversion.
- Fill in solid areas. If a section should be a solid color, fill it completely rather than leaving it loosely shaded.
- Use white paper. Lined or colored paper adds noise that complicates the conversion.
- Keep it simple. Cross stitch works in a grid — intricate curves and tiny details will be lost. Design with the grid in mind.
Scanning vs Photographing
You have two options for getting your drawing into digital form:
Scanning produces the best results. A flatbed scanner at 300 DPI gives you a clean, evenly lit, distortion-free image. If you have access to a scanner, use it.
Photographing with your phone works well if you follow a few rules: use natural light, hold the phone directly above the drawing and not at an angle, avoid shadows from your hand or phone, and make sure the entire drawing is in focus. Most modern phone cameras produce quality that is more than sufficient.
Cleanup Tips
Even a well-photographed drawing usually needs minor cleanup:
- Crop tightly around the design — remove margins and empty space
- Increase contrast slightly to make lines crisp against the background
- Adjust brightness so the paper background is as close to pure white as possible
- Remove stray marks or smudges if your phone's photo editor supports it
Turn Any Photo Into a Cross Stitch Pattern
- Accurate DMC color matching
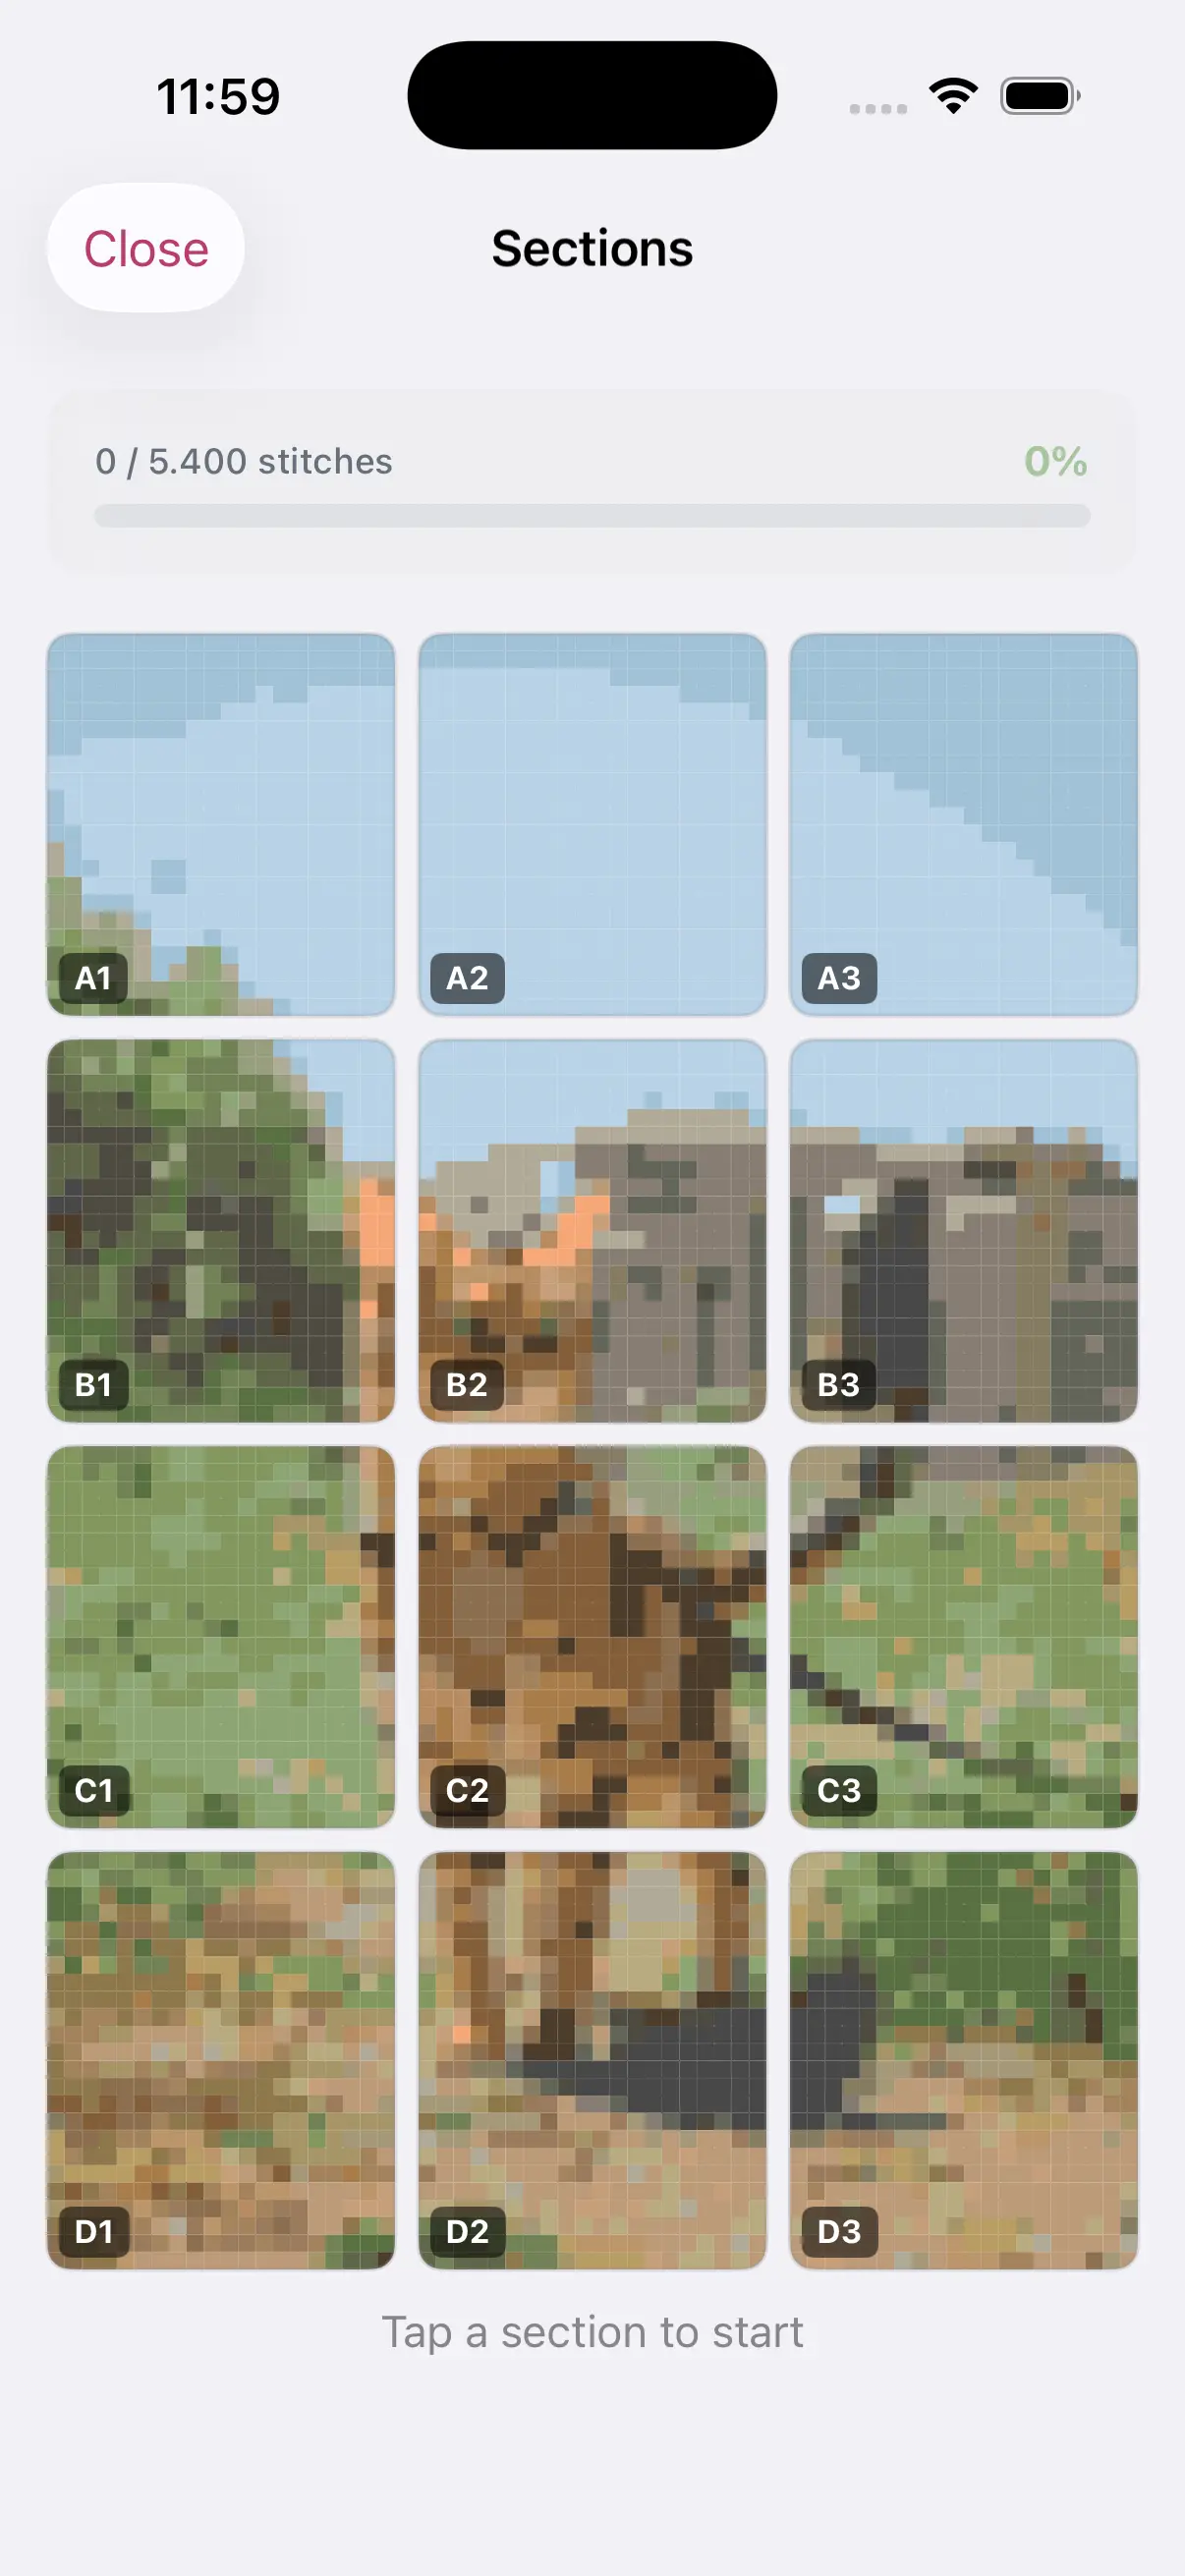
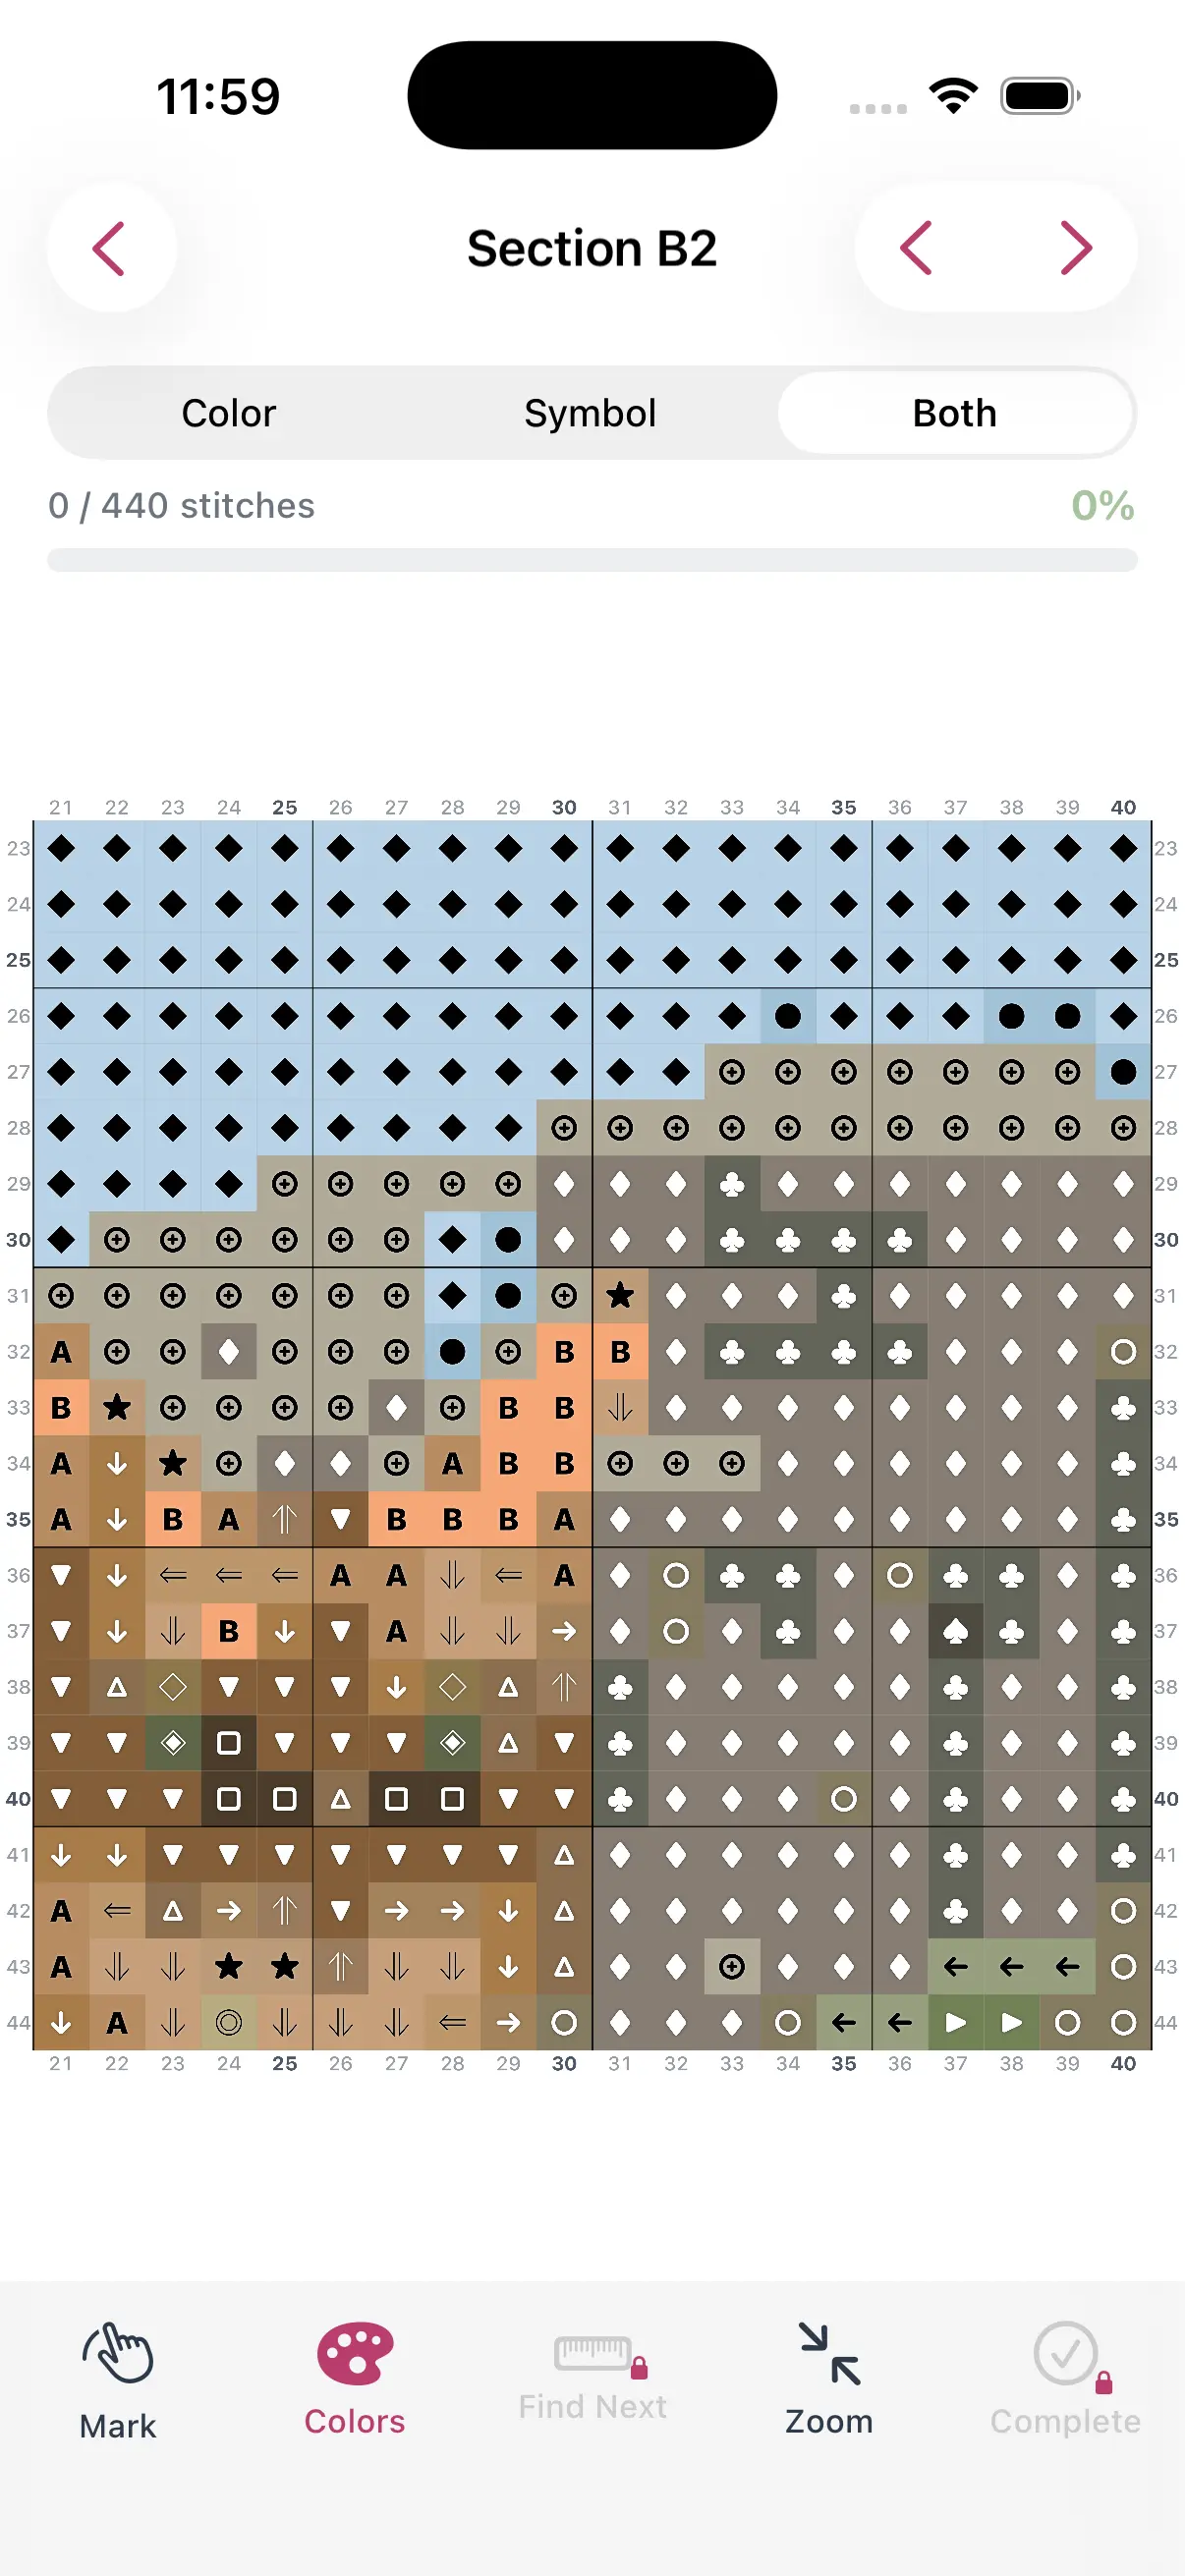
- Track progress stitch by stitch
- Export print-ready PDF charts
iPhone & iPad
Converting in StitchCraft
Import your cleaned-up image into StitchCraft like any other photo. The app will convert it to a grid-based pattern using your chosen settings.
For hand-drawn designs, these settings work best:
- Low color count of 4-8 colors to preserve the graphic quality of your drawing
- Grid size matching your intended stitch count — smaller grids keep the design bold and readable
- Review the preview carefully — hand-drawn lines may need a slightly larger grid than you expect to remain recognizable
Adjusting the Digital Version
After conversion, use StitchCraft's pattern editor to refine the result. Smooth out jagged lines, clean up stray pixels, and adjust colors that did not convert as expected.
This is where digital and hand-drawn merge. The original drawing provides the creative foundation, and the digital tools let you polish it into a precise, stitchable chart.
Combining Digital and Hand-Drawn
Many designers work in a loop: sketch on paper, digitize, refine digitally, print, sketch modifications on the print, re-digitize. Each pass improves the design. Do not treat the first conversion as final — treat it as a starting point.
Download StitchCraft to digitize your hand-drawn designs and turn paper sketches into cross stitch patterns.